
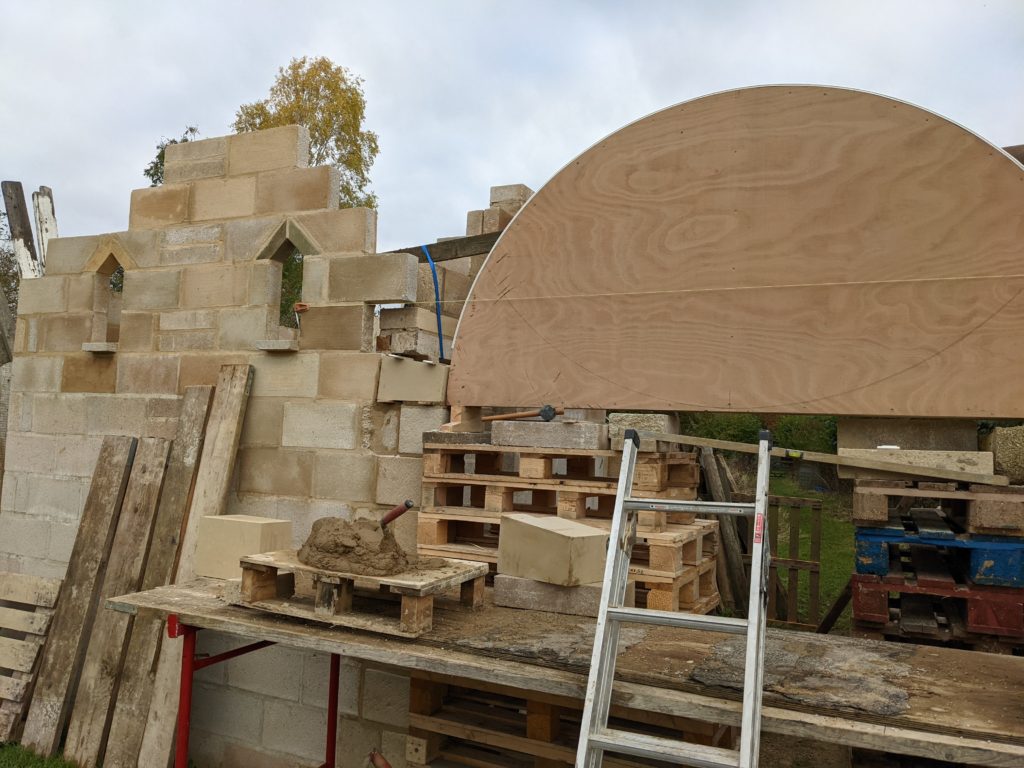
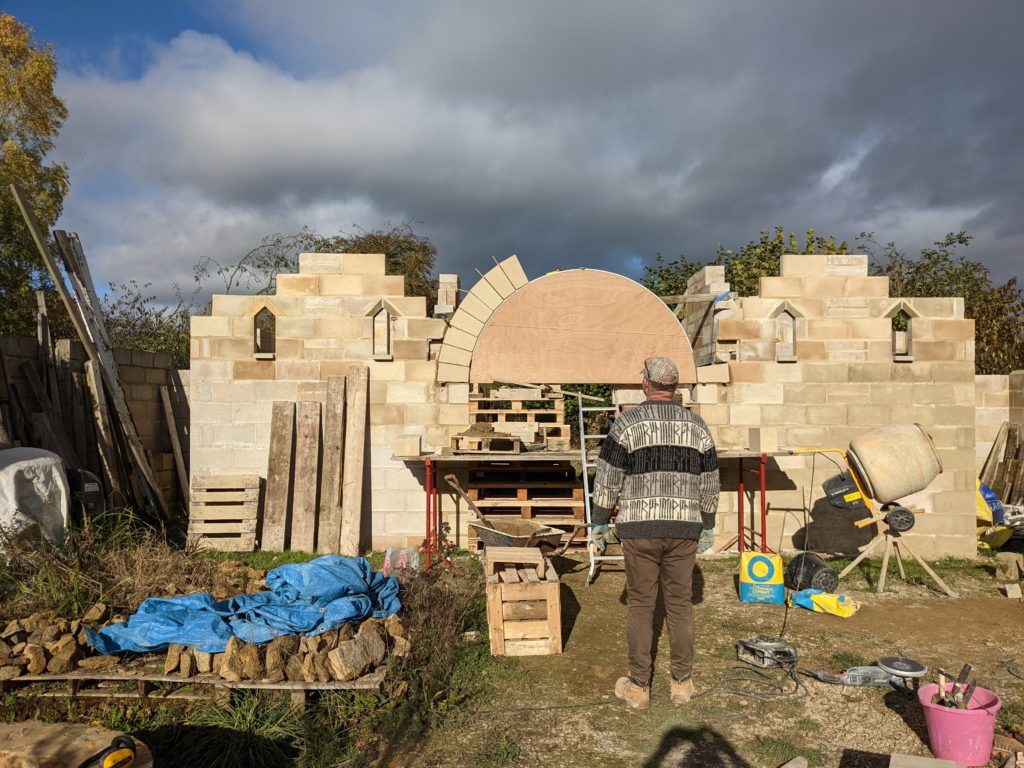
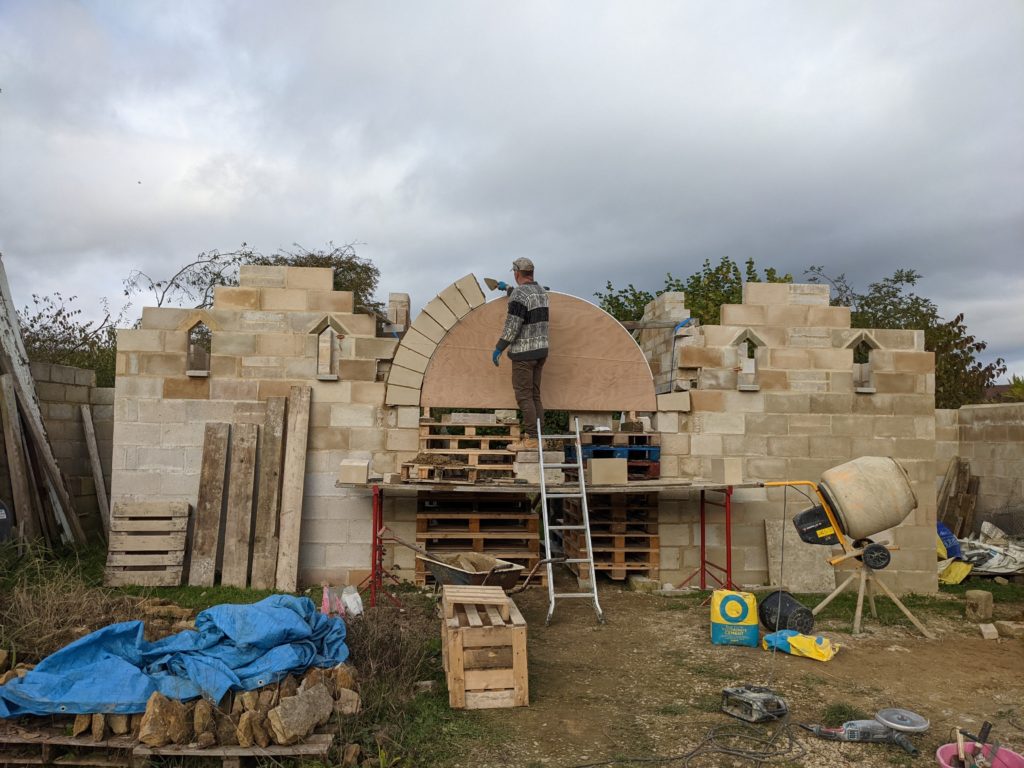
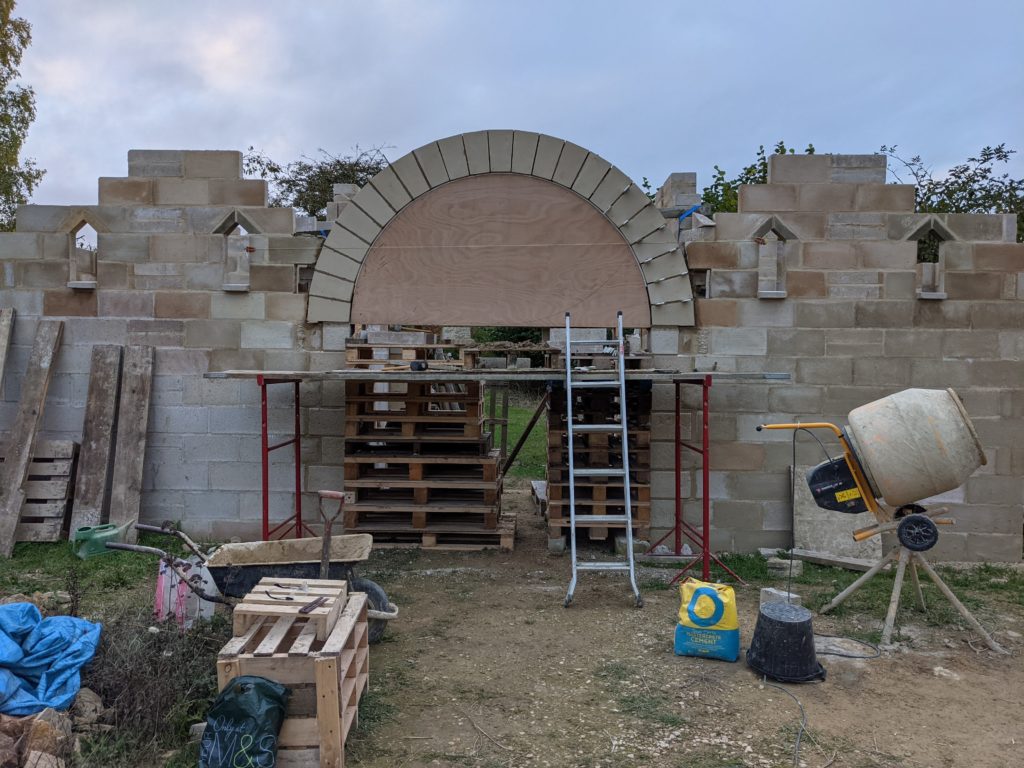
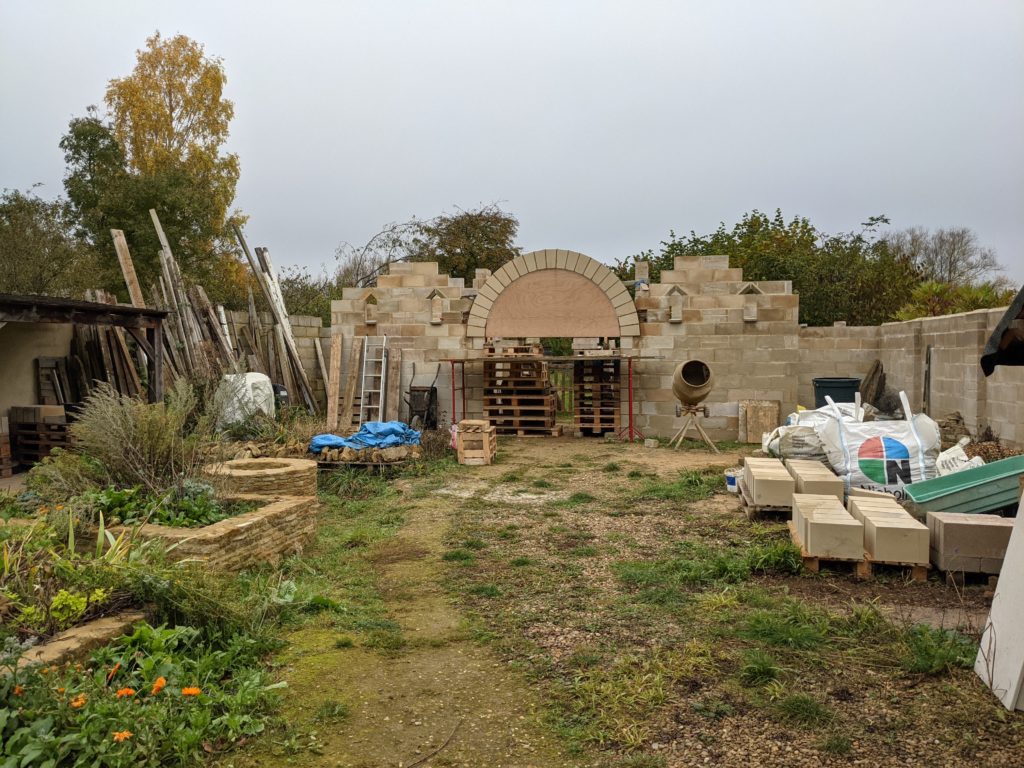
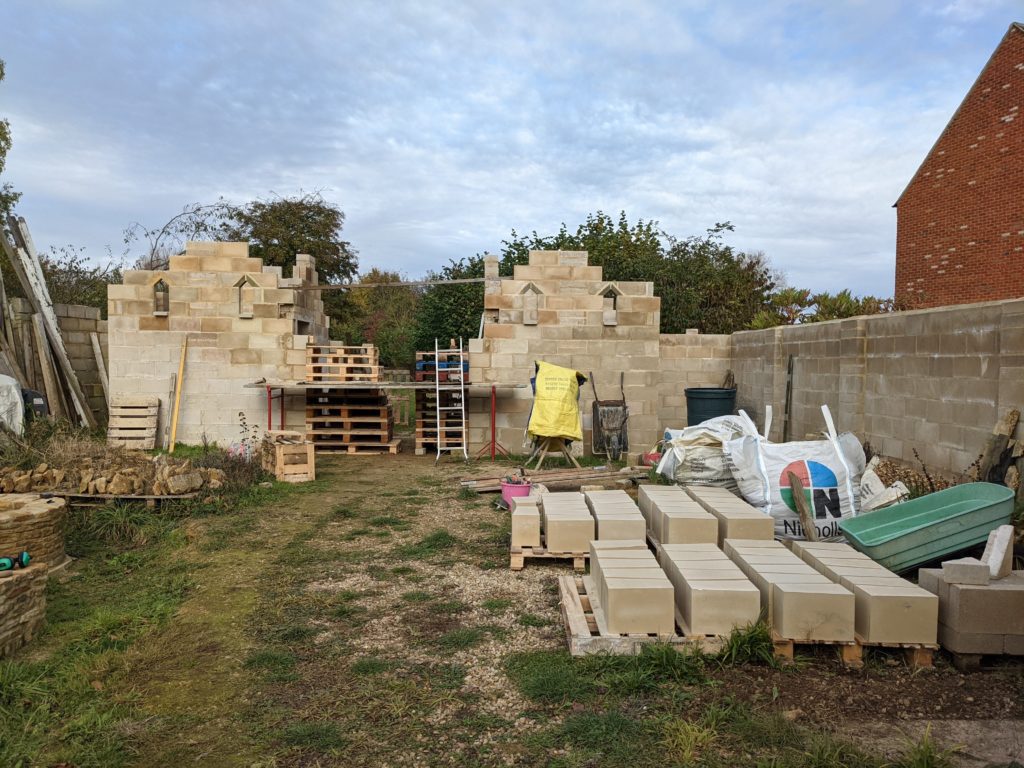
The former has been reset and the outer arch of the gatehouse is under way.
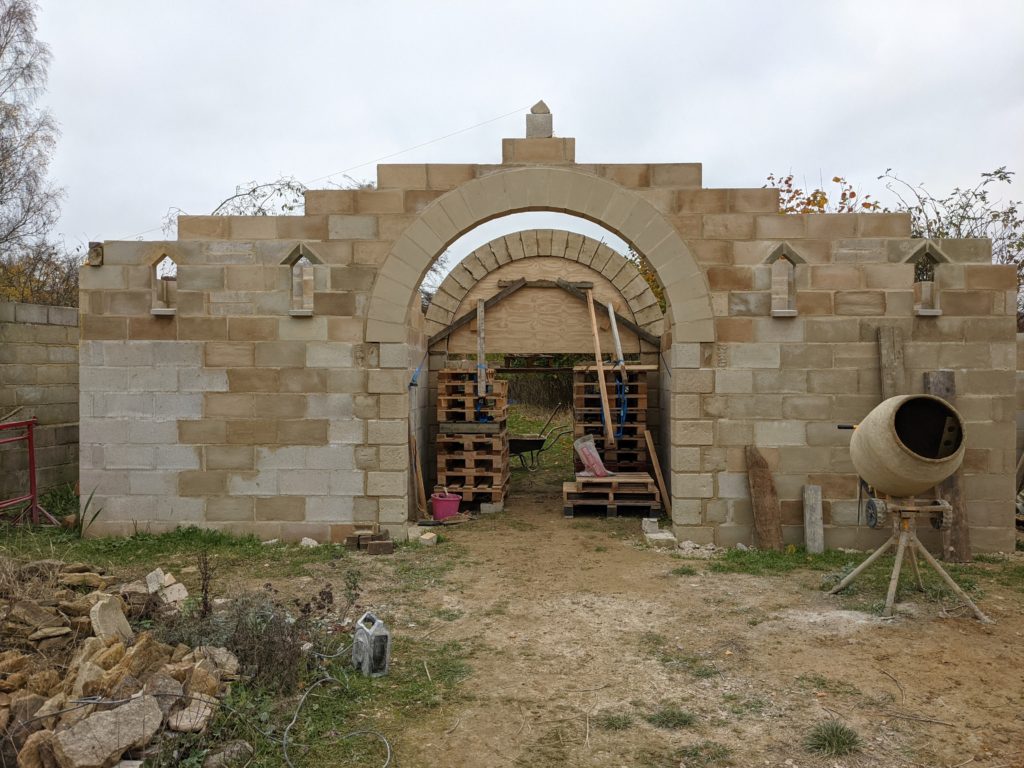
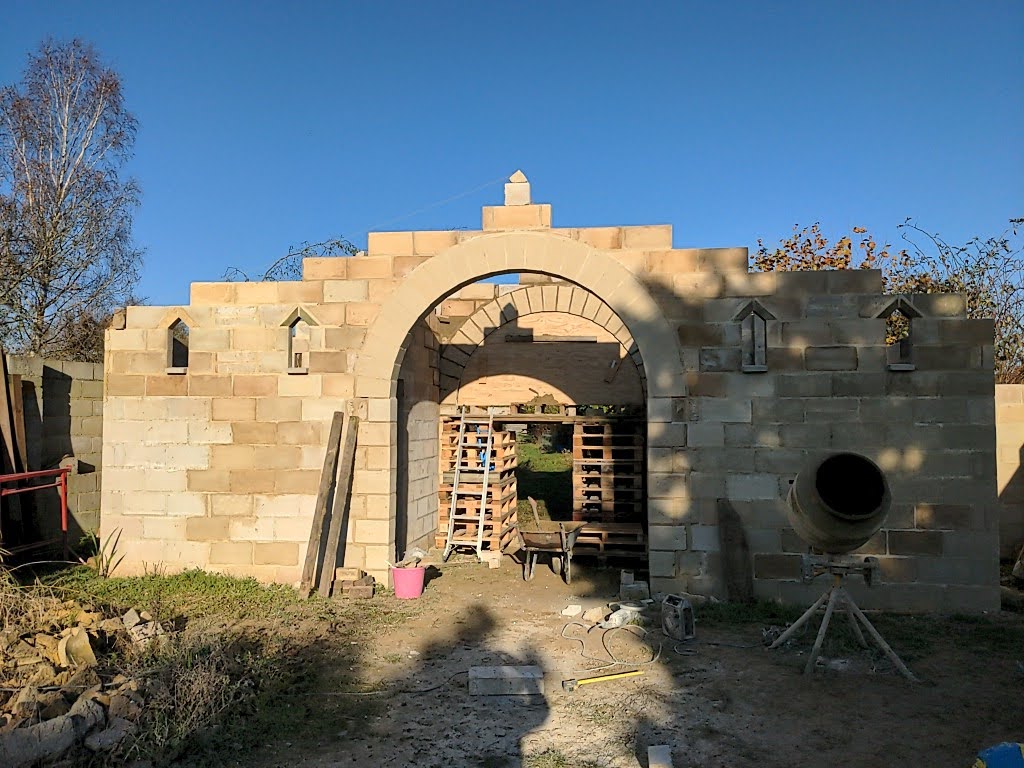
The former has been reset and the outer arch of the gatehouse is under way.
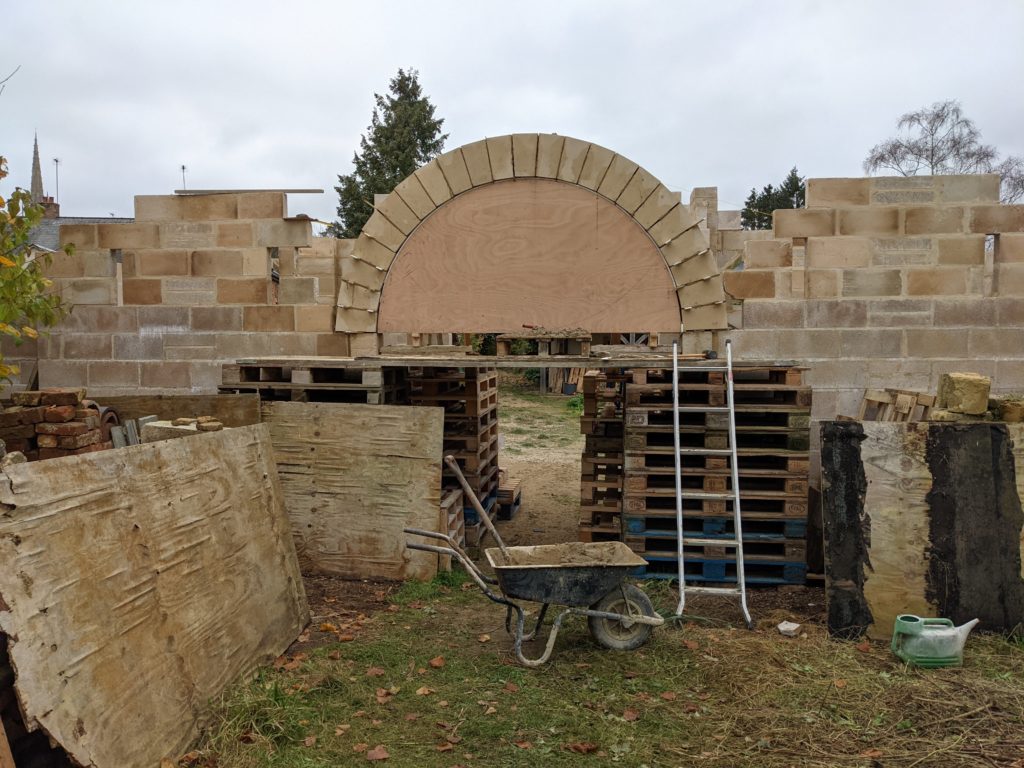
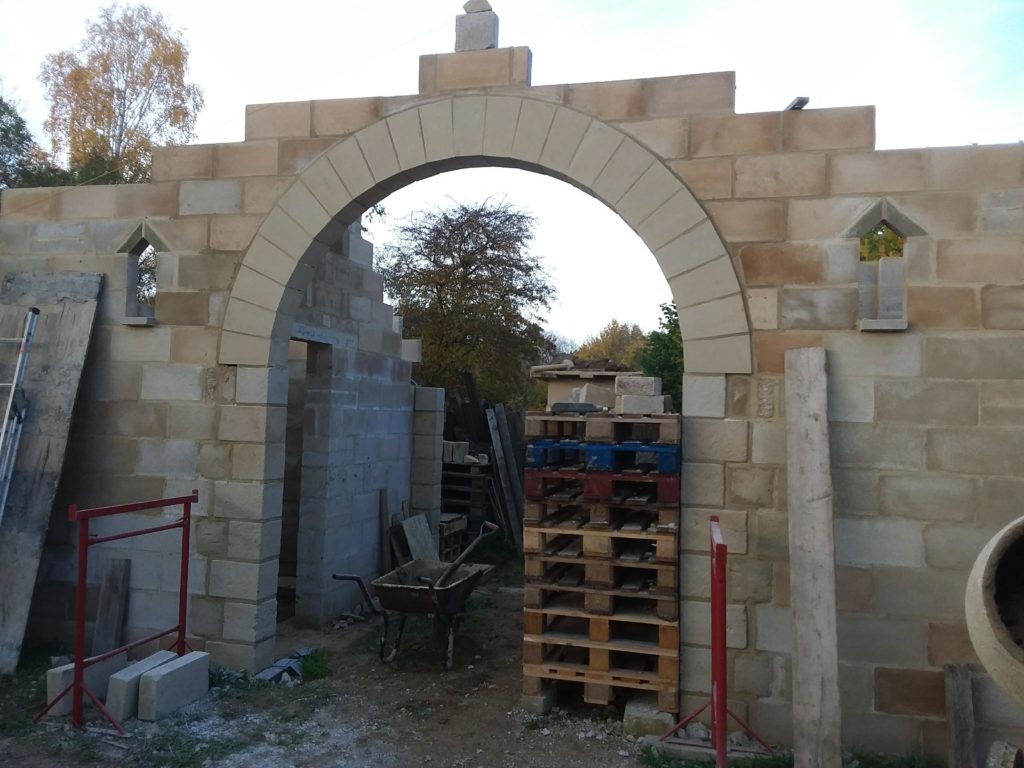
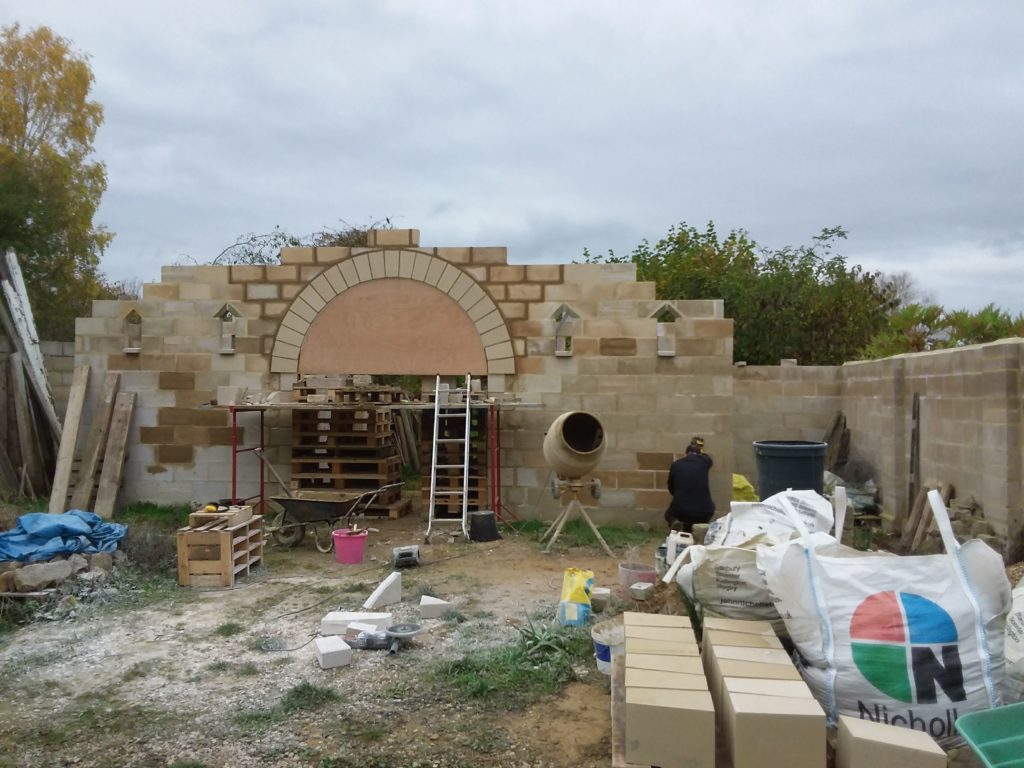
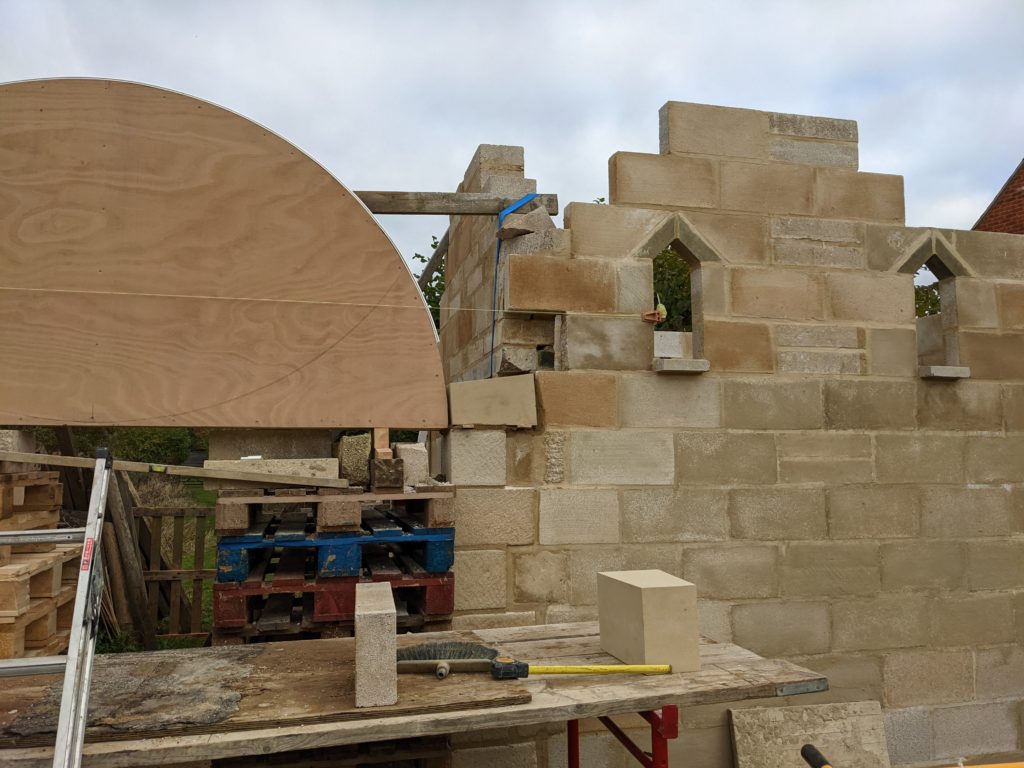
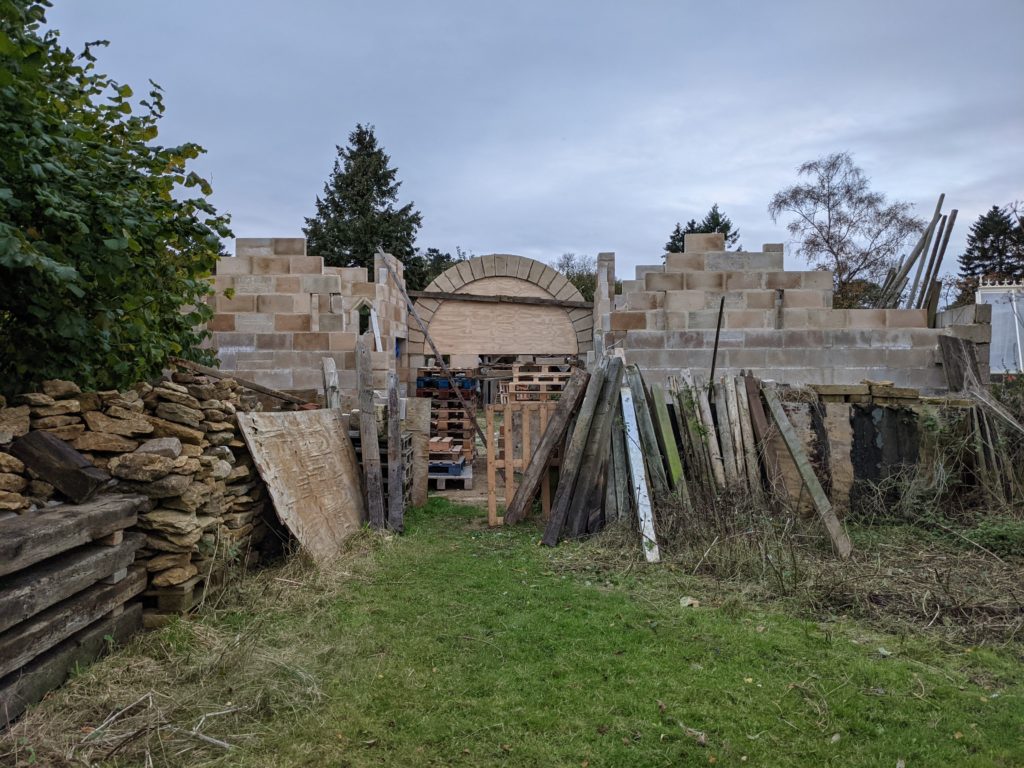
The former has been taken down and the inner arch looks great!
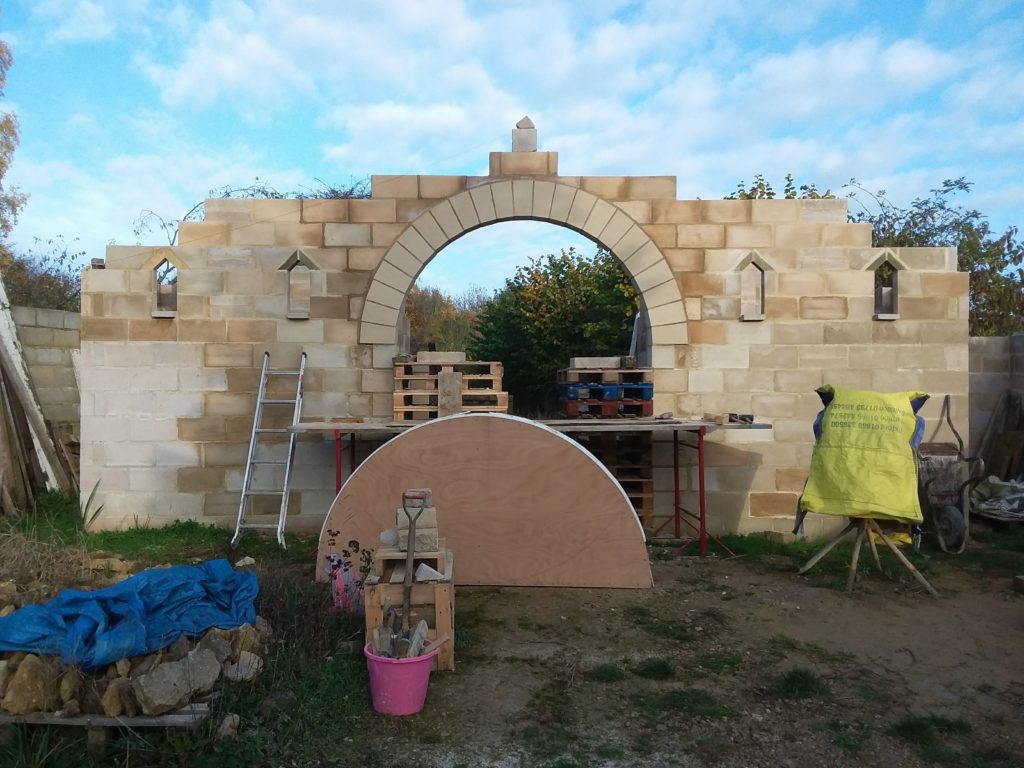
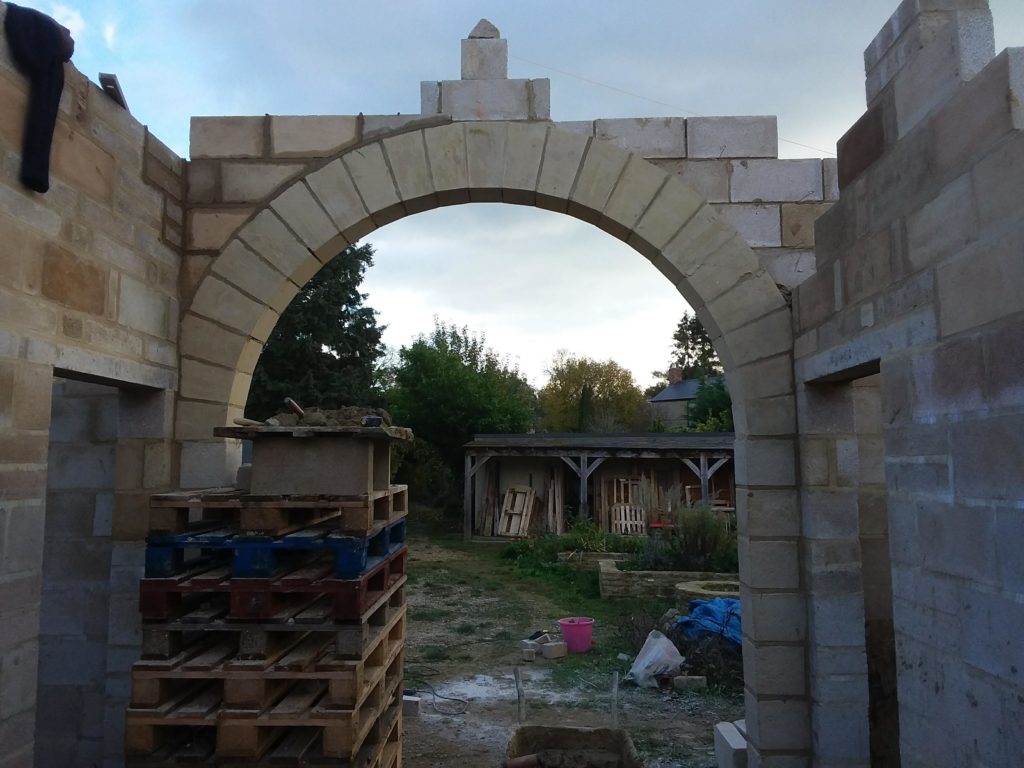
Having built the arch, the next step was to build up the wall around it, which involved lots of fiddly jigsaw-type cutting and fitting of blocks.
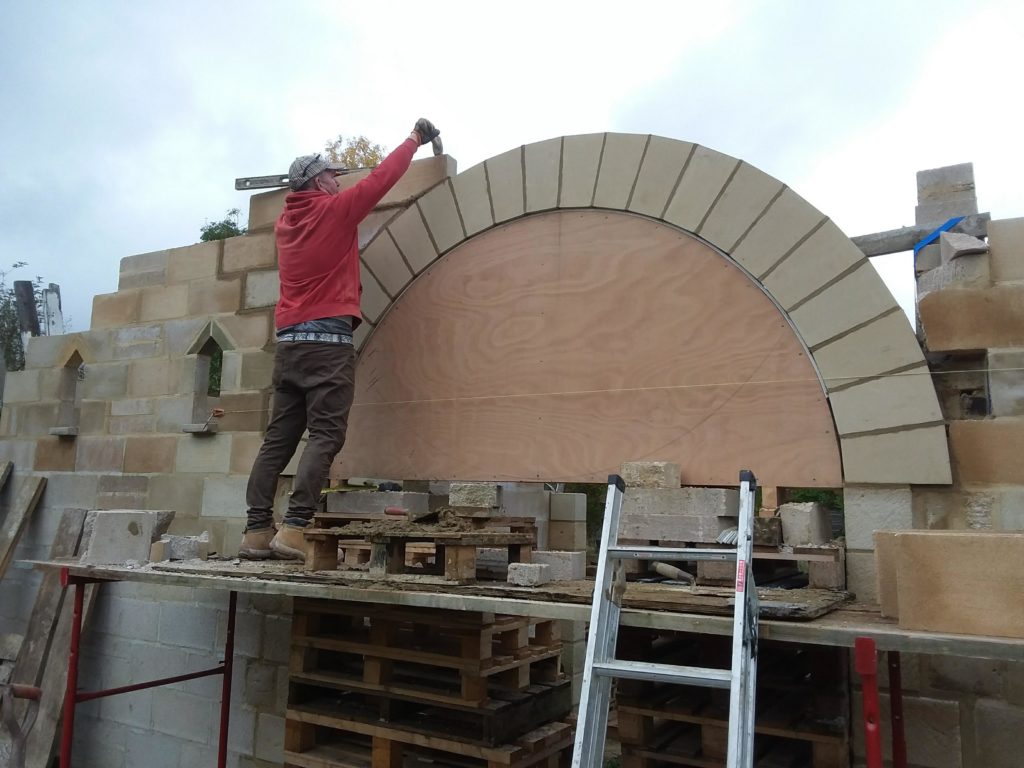
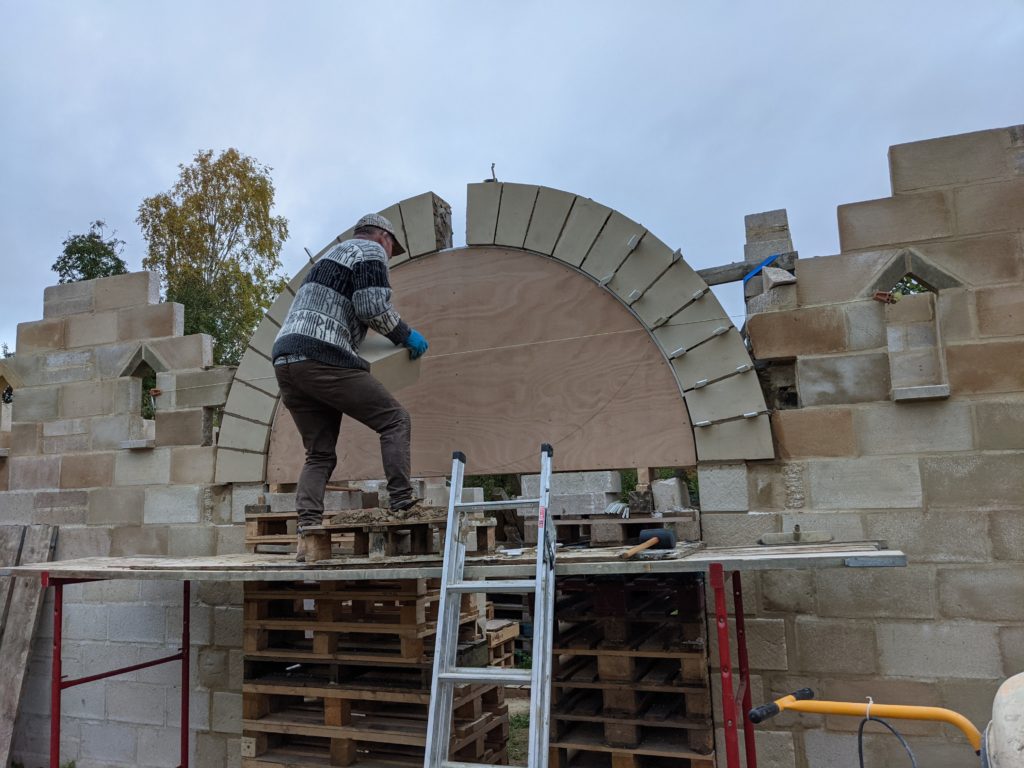
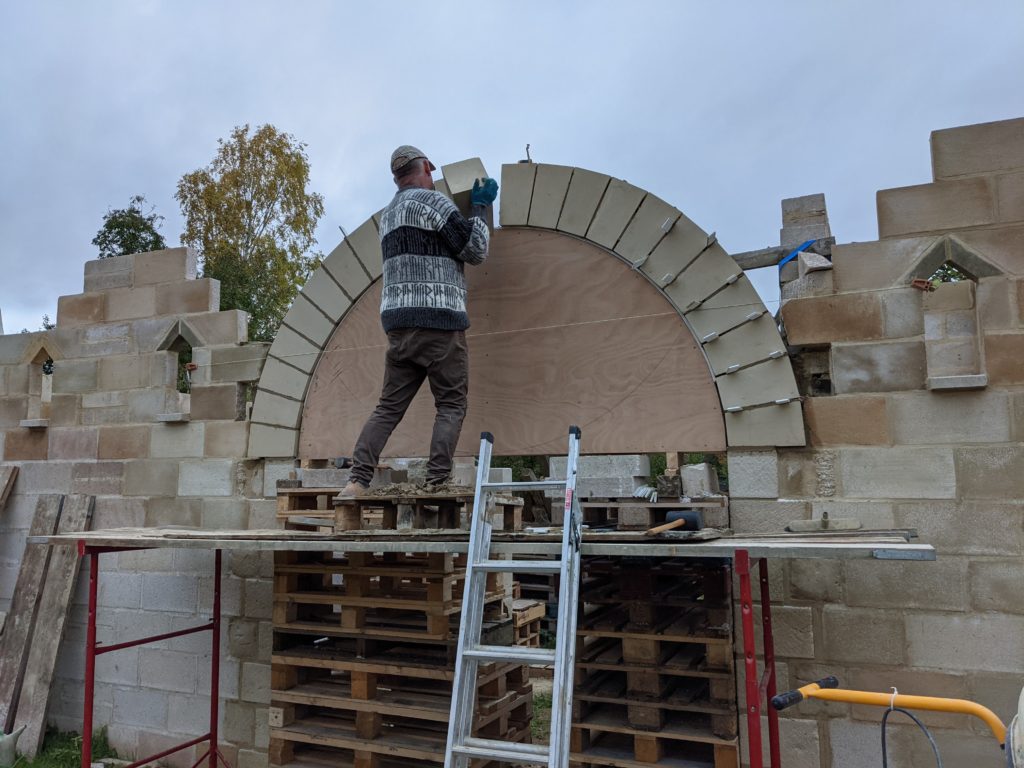
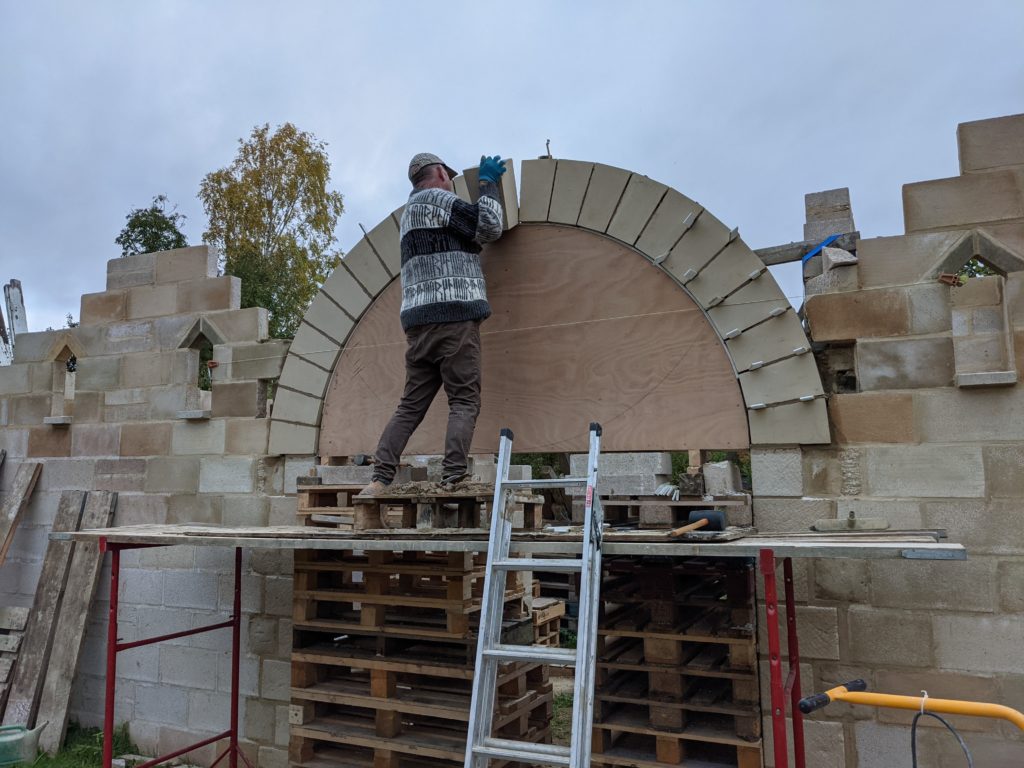
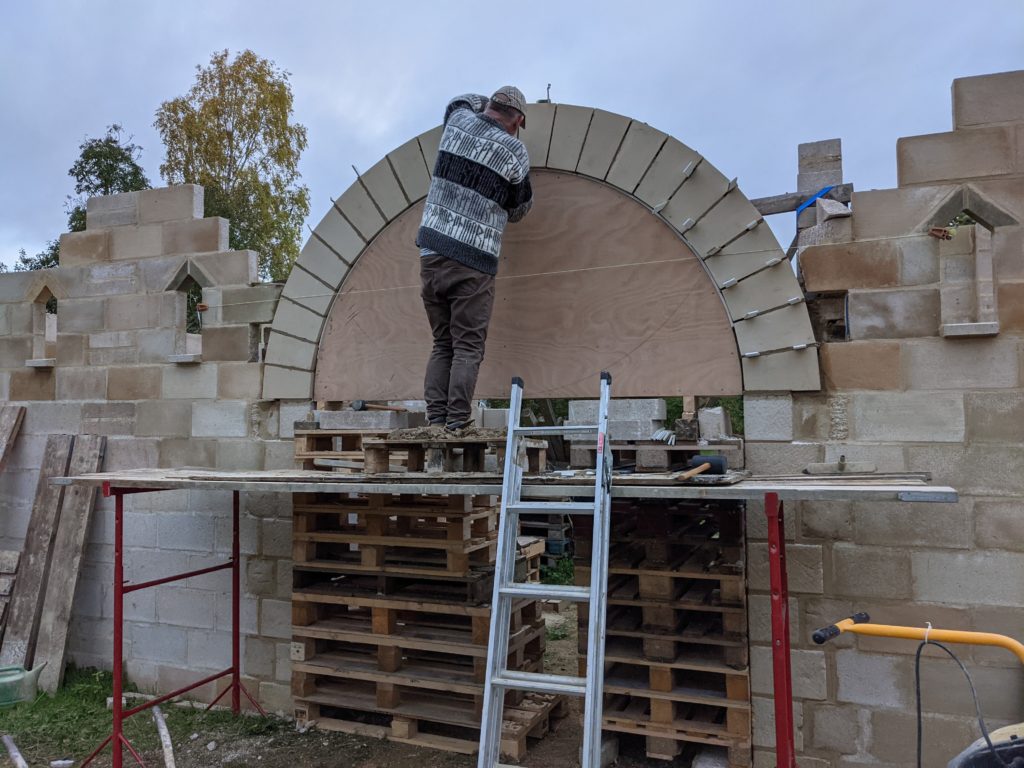
You will remember from my previous post that “voussoir” is the technical term for shaped blocks to form an archway, and ours were cast in artificial stone by the fabulous people at Bespoke Concrete. Tuesday November 9th was the great day when everything was ready and Chris arrived bright and early to try to build the entire arch in one day. Splitting it into two days build would have been possible but we all felt it would be much better to complete it in one go instead of leaving part of an arch overnight. This was a good decision.
We chose to build the arch out of just one type of block as it made designing and sourcing the blocks easier. So the springers (the bottom stone of the arch on each side) and the keystone (the top centre stone) are all the same slightly trapesoid block.
If you’d like to see a real Roman arch in Britain, go to Lincoln where are not one but two Roman gate arches dating back to the third century CE still in place. Aren’t they fab?
The block above each springer had to have a section cut out to fit against the lintels over the doorways to the side chambers. Al made templates to facilitate accurate cutting. The cutouts don’t show from the outside. We’re a bit pinched for space so everything is squeezed in a littler closer than would be ideal.
We did not realise it at the time but these photographs reveal another significant error on our part. Do you see what it is? If not don’t worry, you’ll find out at the same point we did…read on…
It was around this point that we realised that by aligning the bottom of the former with the top of the pillar blocks, we had effectively reduced the height of the arch by 20 mm. The former should have been raised 10 mm above the top of the pillars so the springers were aligned with the bottom of the former, but the springers were actually 10 mm higher because of the mortar layer on top of the pillar blocks. This meant there wasn’t room in the middle for the final keystone. Fortunately, the mortar was all still wet so Chris was able to nudge the blocks either side and reduce their spacing enough to slot in our keystone. It shows just how easy it is to make a mistake on an unfamiliar project.
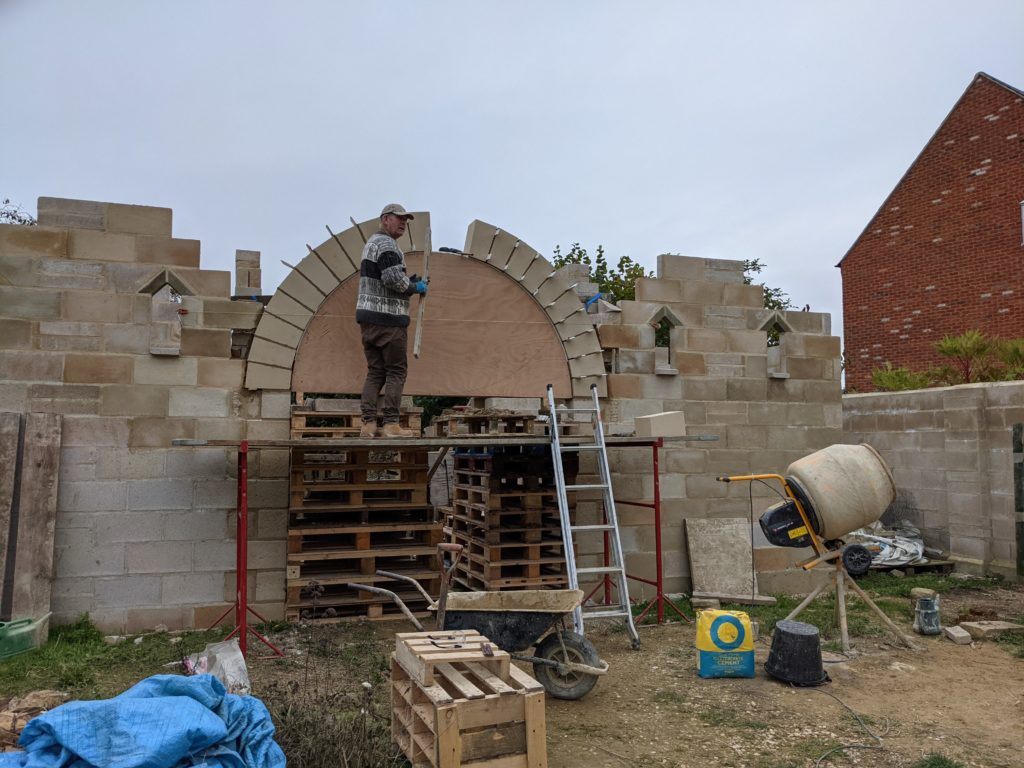
Here’s the arch finished; this photo was taken the next day as Chris did all the pointing and filling in of gaps where the spacers had been between blocks after dark, by the light of one of they modern LED battery-powered work lights. Yay for modern technology!
Chris has built arches before but not this scale, and the entire process was new to the rest of us. Logic, trigonometry and first principles got us a long way, but lack of experience caused us to make several mistakes. These were fixable, but cost us time and stress; fortunately Chris’s skill and Al’s ingenuity saw us through. Overall though, we’re jolly happy to have a Roman arch!
Preparation is the key to success…so the first day of arch building was dedicated to checking the blocks against the “former” (the timber semicircle to support the arch while it is built) and getting the former firmly set up. Note Chris’s sweater, which is a Judith Glue special and says “Uurkni” meaning “Orkney” in Maes Howe viking runes. Bloody Vikings, coming over here building our Roman gatehouses in our Anglo-Saxon monastery sites…
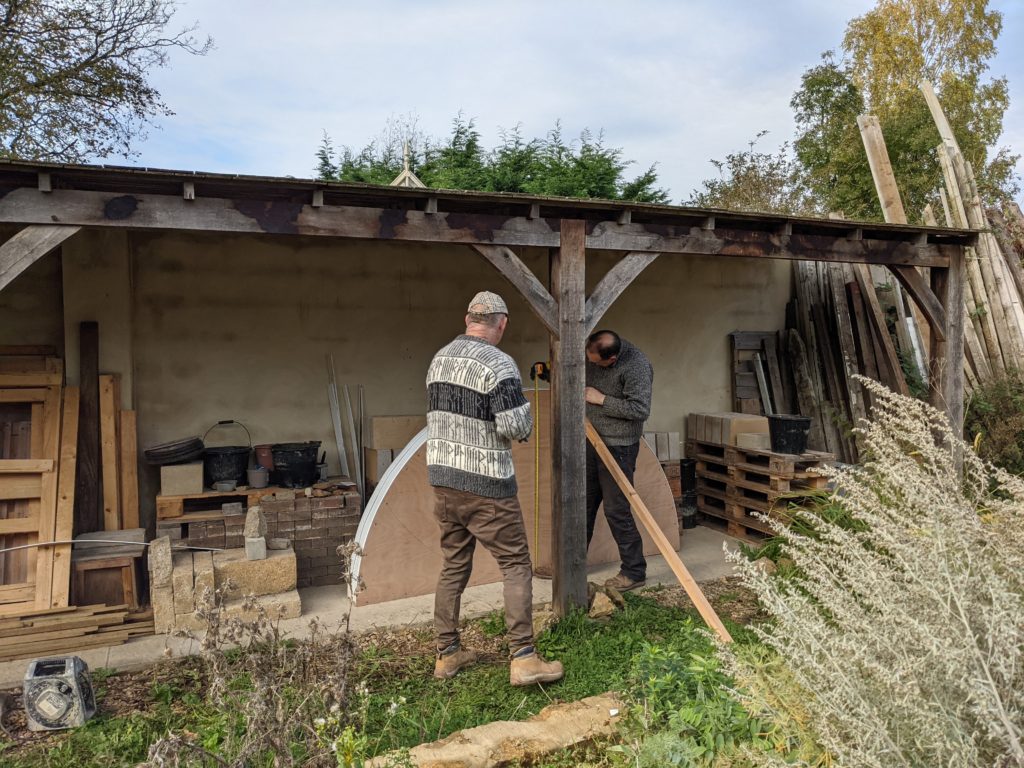
In the photo above, Al and Chris are discovering our first notable mistake, which was my error. Dave made the former as a semicircle of the right size for the blocks, but I mistakenly thought it should be checked against the opening between the pillars and it ended up slightly differently sized. This caused problems as it was now too small for the blocks. Luckily Al had scavenged materials in store and was able to add a thin layer of flexible plastic strip to correct the size of the former.
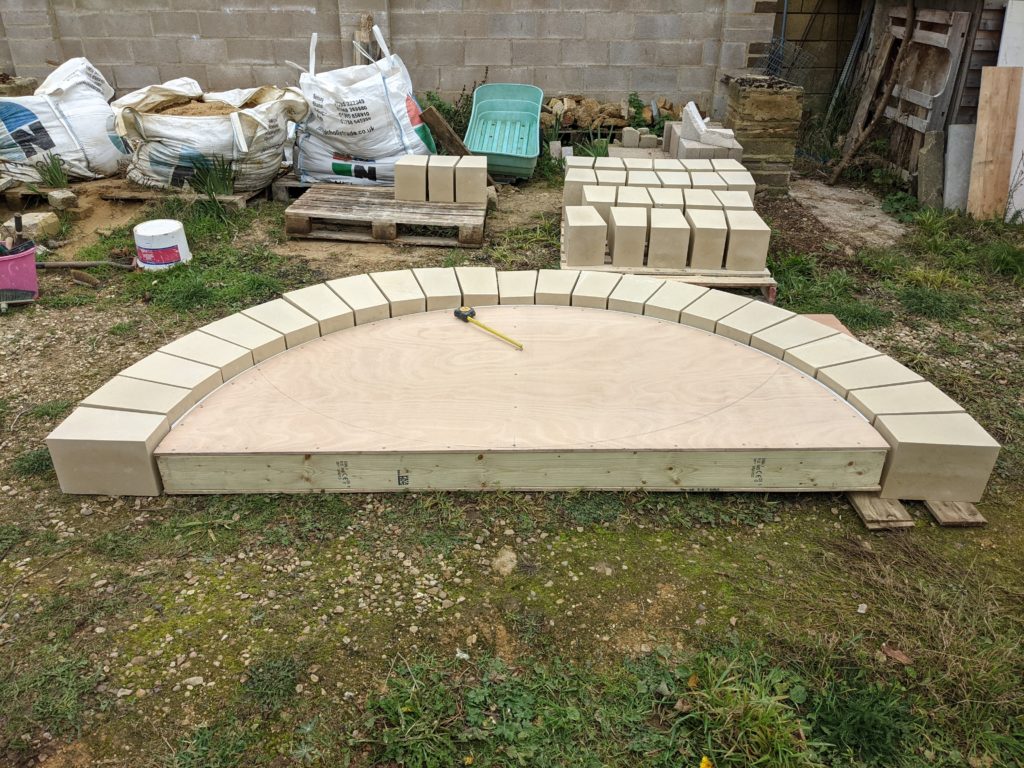
The easiest way to be sure that the blocks would fit around the former was to lay them all out on the ground, rather than risk finding out there was a problem after lifting the heavy blocks up. This process was good in principle but we did make another mistake which came to light the next day.

It took Chris and Al a full day to fettle the former to the right size, check everything and get it in place ready to lay the blocks the next day.
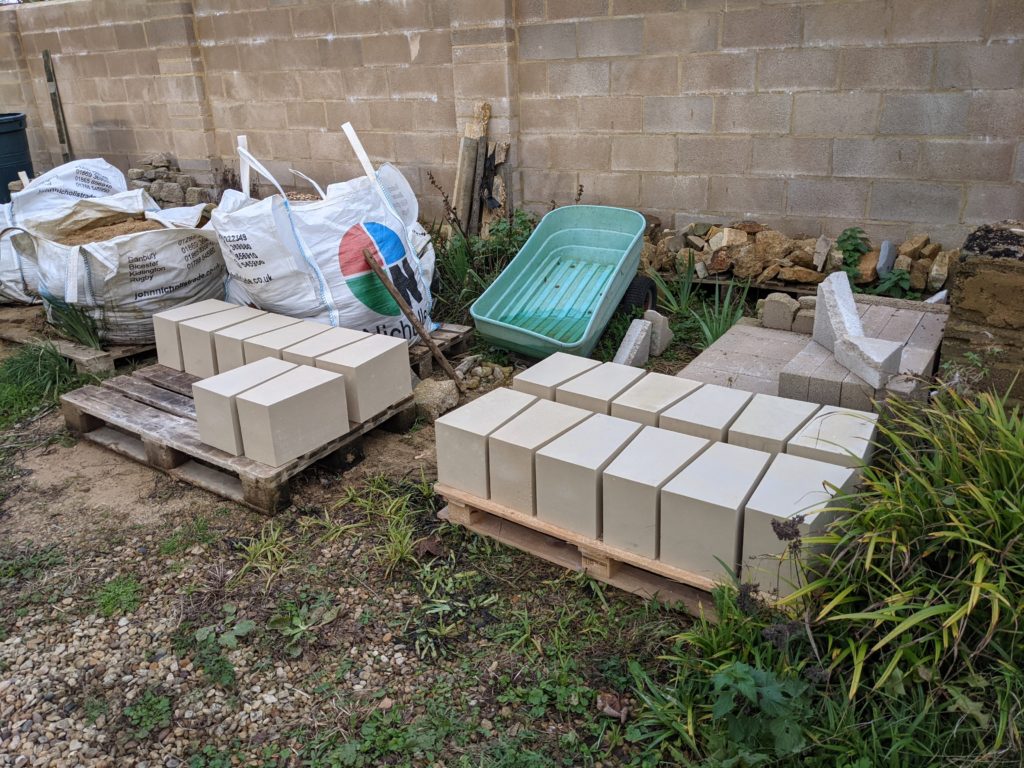
The quest to source our voussoirs has been long and somewhat fraught. What’s a voussoir you ask? It is a shaped block for forming an arch. We could have gone for a rough ring arch, like those built by the Anglo-Saxons at Brixworth church (more photos here) using reclaimed Roman stone and brick, but our hearts were set on a proper stone archway for the gatehouse, as you’d find in any good stone Roman fort. The cost of actual hand-carved stone being prohibitive, Al cast the straight blocks for the pillars out of an artificial stone mix, setting fossils into the surfaces for extra verisimilitude. These are fab but took a lot of work and the making of angled moulds proved too much of a project for us. So there followed a trawl of t’internet for people offering custom cast concrete blocks, and we absolutely lucked out by finding Bespoke Concrete who cast our voussoirs in a beautiful buff artificial stone which looks pretty much exactly like Bath stone.
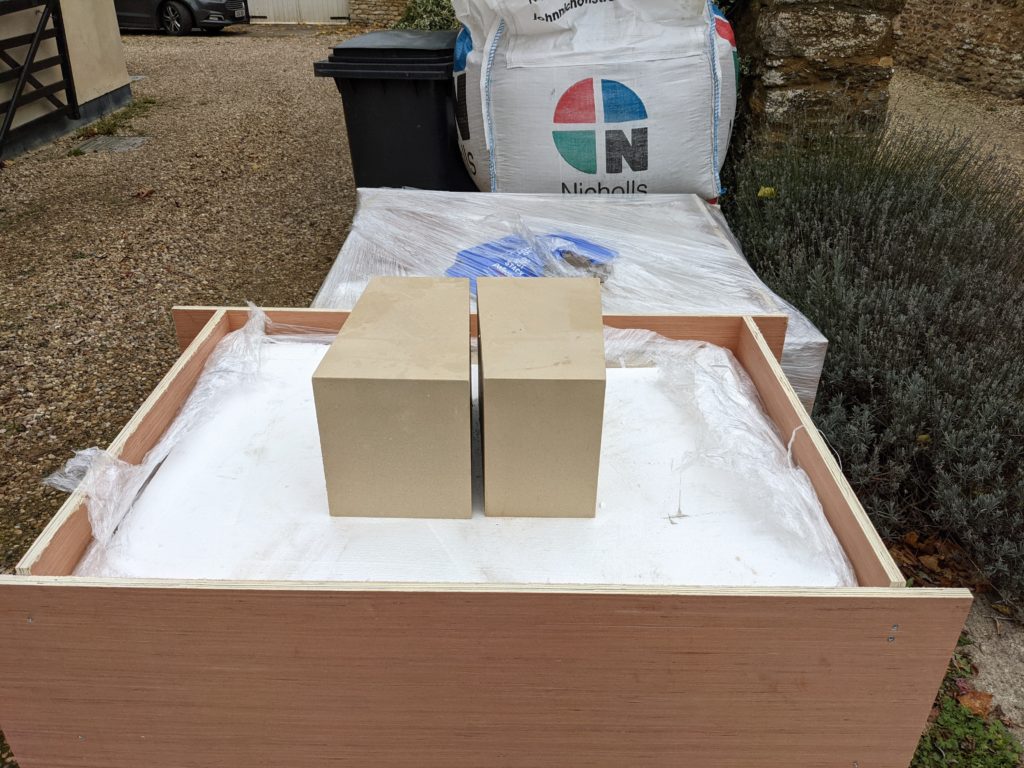
It was very exciting when the blocks were delivered on Friday; we did our trigonometry as carefully as possible to work out what size and shape the blocks should be to form the arch, and there was no reason to think anything would go wrong with the manufacturing process, but it was a great relief when we saw that they are indeed exactly as we wanted. Top marks to the folks at Bespoke Concrete, they did a perfect job.
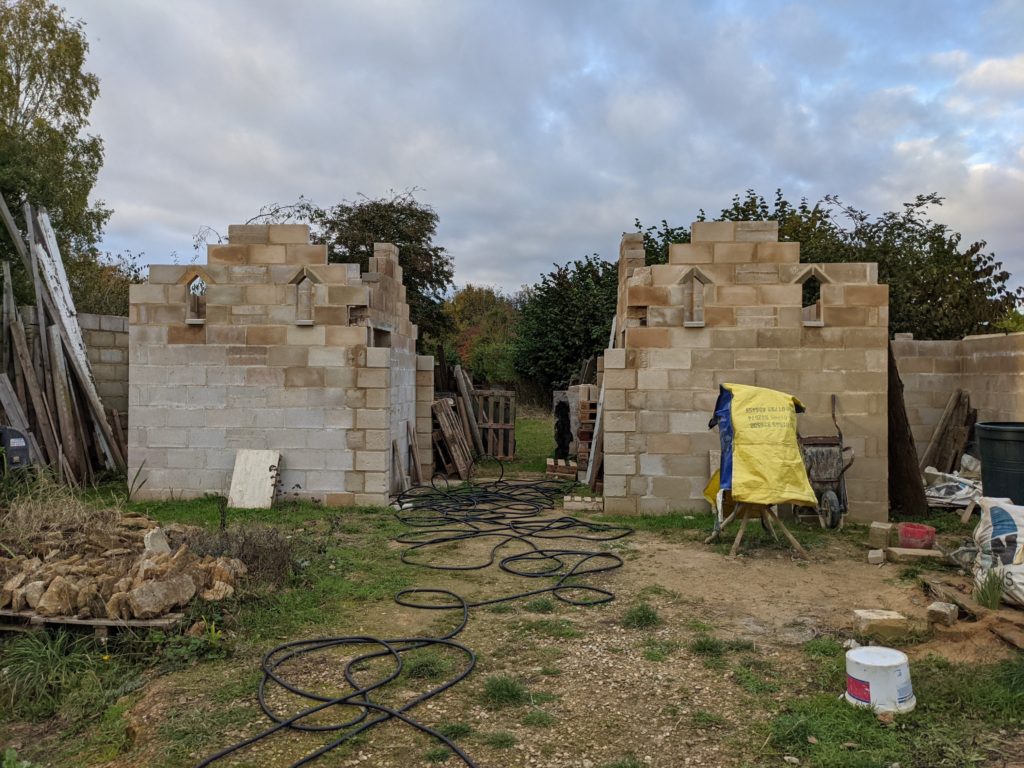

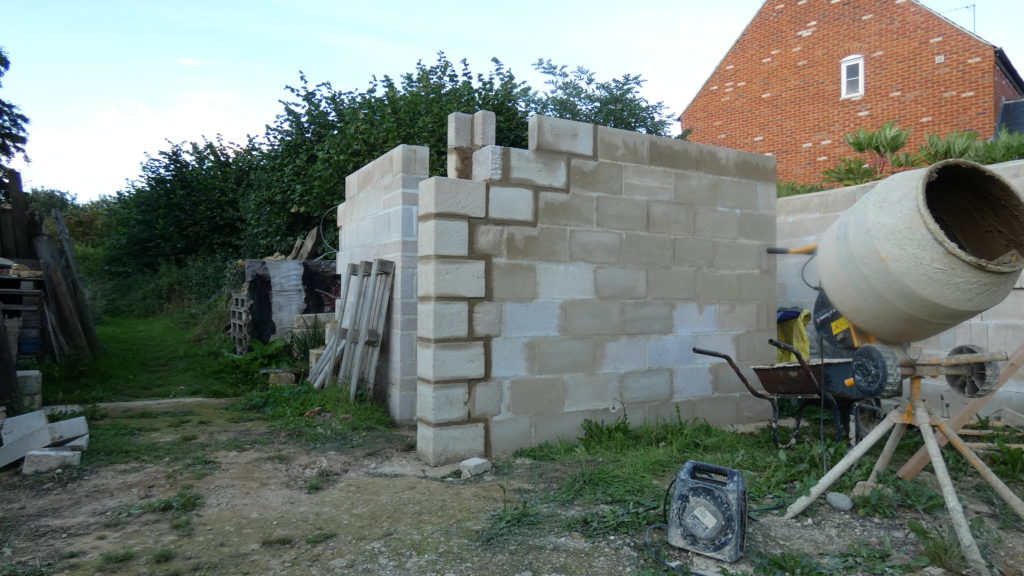
After a slow start to the year, what with plague and other sundry delays, work has restarted on the Roman gatehouse! Brother Alf has cast the blocks for the archway pillars, added a scattering of fossils in the surface and hand-finished the surfaces to give them that worked stone look. Chris the stonemason has been at work building the pillars and adding to the walls.
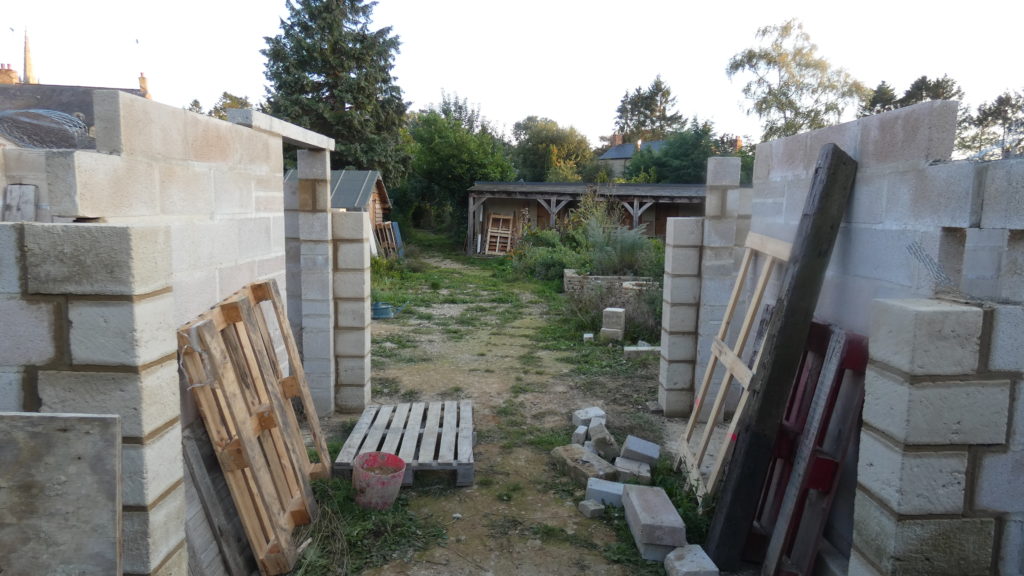
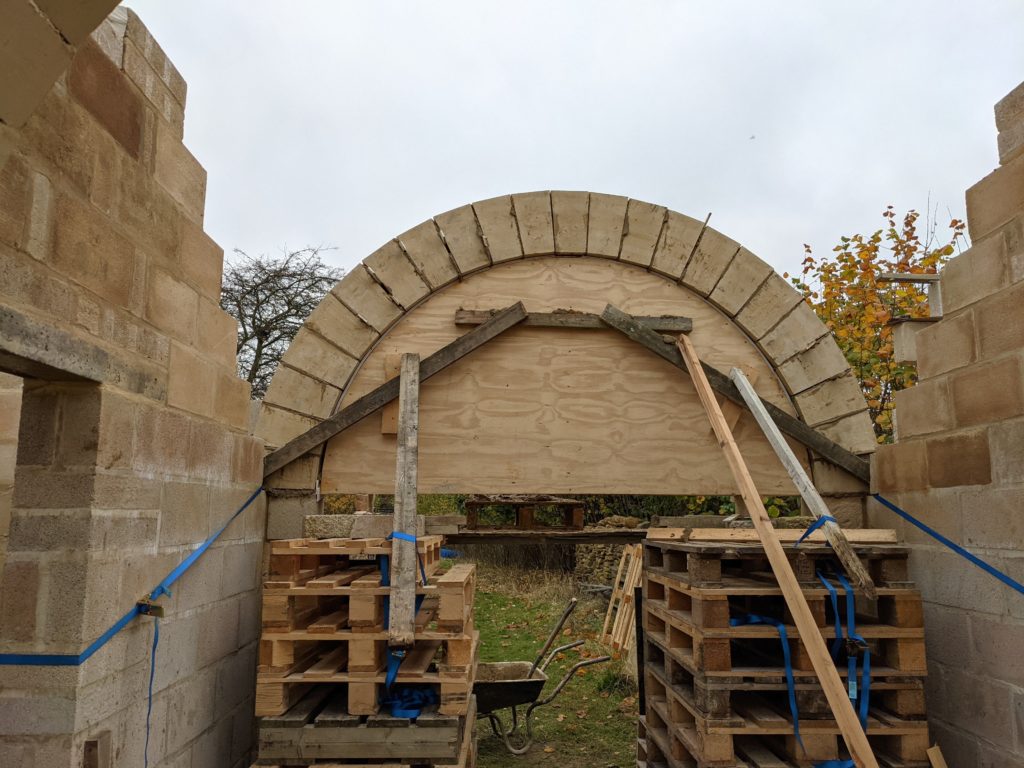
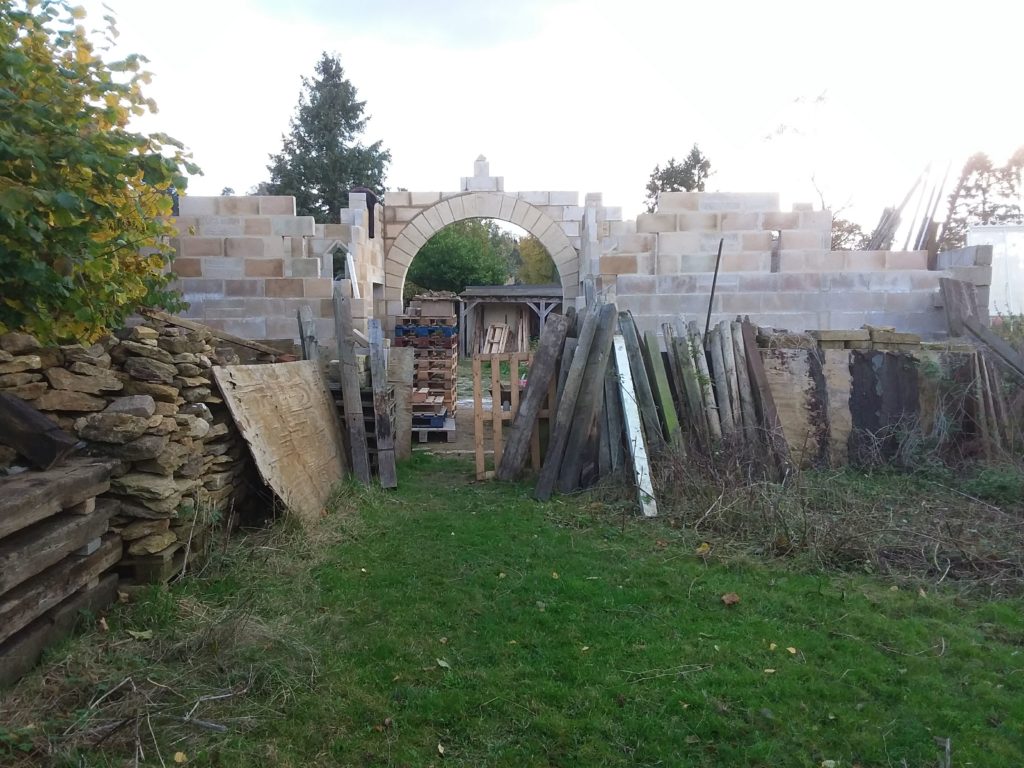
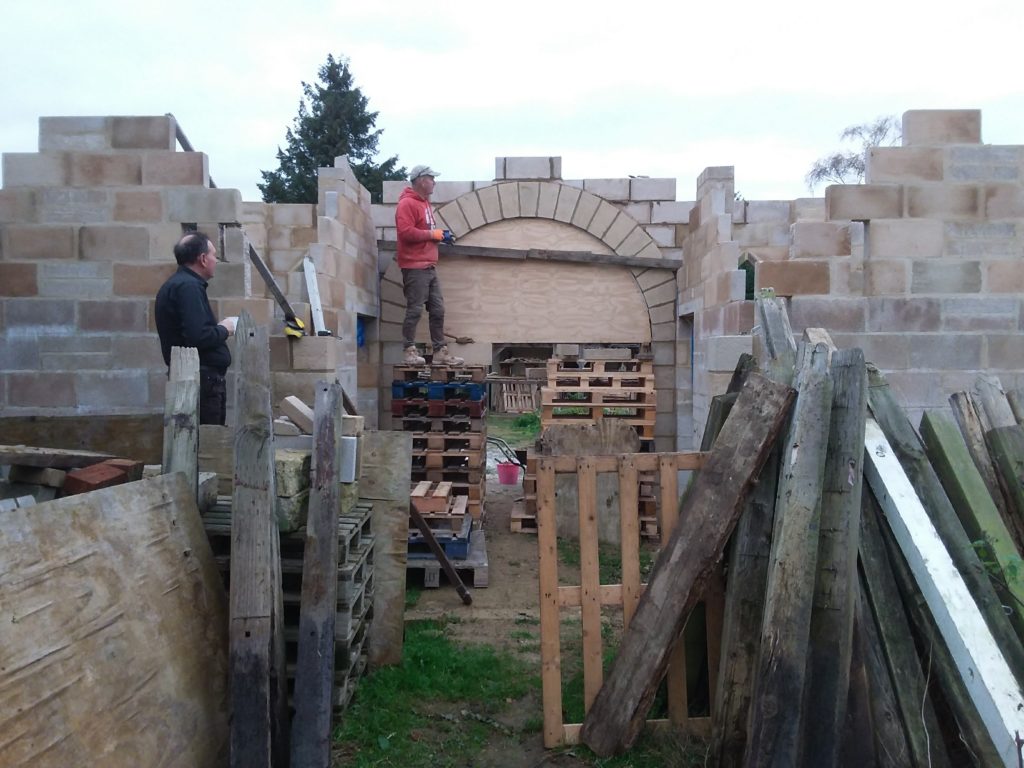
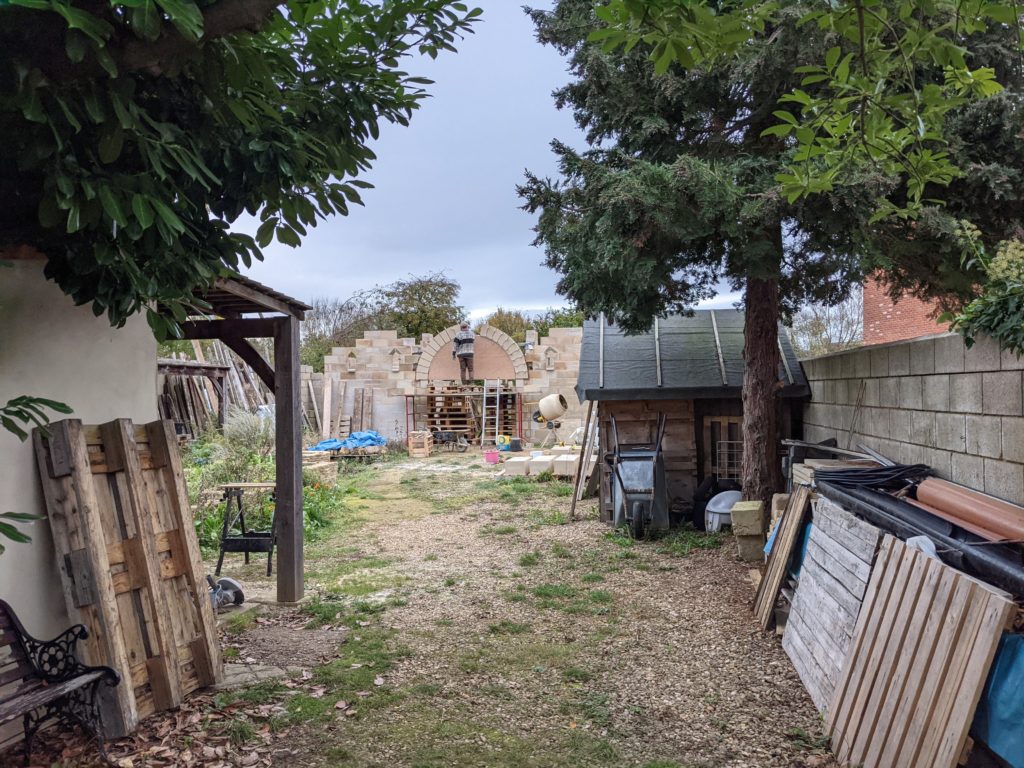
Standing in the proto-tunnel, you can finally start to get a sense of the space.
The mitred blocks for the semi-circular arches – voussoirs, if you want to be all technical – are being cast by an external company because they are Too Hard For Us! We have done our ‘O’ level trigonometry, repeatedly, jointly and severally, and we’re pretty sure we’ve provided them with the right dimensions, and they’ve understood them. But only when the 48 blocks are delivered will we find out if they fit together to make the right size of arch! Nervewracking!